Set Up Your Server
Get your OrOrbit server running in under 10 minutes.
Your own chat server, fully under your control. Let’s get it running.
What You’ll Need
- A computer that will act as the server (Windows today; macOS and Linux coming soon)
- At least 2 GB of RAM and 1 GB of free disk space
- An internet connection
🤔 What's a self-hosted server?
Instead of using someone else’s servers, you run OrOrbit on your own hardware. Your messages, files, and voice calls never leave your network unless you choose to make the server accessible from the internet. If you’d rather skip the setup, OrOrbit Pulsar can host a server for you.
Install & Start
Start the Server
⚠️ Save your admin secret
Copy your admin secret and store it somewhere safe — a password manager, a note, anywhere you won’t lose it. Treat it like a password. You sign into the admin panel normally with your account, but this secret is your emergency recovery key if you ever get locked out. Lose it and there’s no backup way in.
⚙ What happens on first launch?
OrOrbit creates a local SQLite database, generates encryption keys and an admin secret, and
starts listening on port 443 (standard HTTPS) by default. You can change the port later in the admin panel
under Settings → Network, or via the PORT environment variable.
Configure Your Server
Open the Admin Panel
Open https://localhost/admin in your browser. The admin panel is where you manage your
server — it’s separate from the chat interface your friends will use.
When prompted, enter the admin secret from step 2.
⚙ Localhost and authentication
When accessing the admin panel from the same machine the server is running on, TOTP (two-factor authentication) is skipped automatically. Remote admin access requires TOTP by default.
Set Up Your Server
Head to Settings in the admin panel sidebar to configure your server:
- Server name — what your friends will see when they connect
- Registration mode — controls who can join (defaults to invite-only, recommended)
- Storage quota — how much space each user gets (defaults to 1 GB)
You can change any of these later.
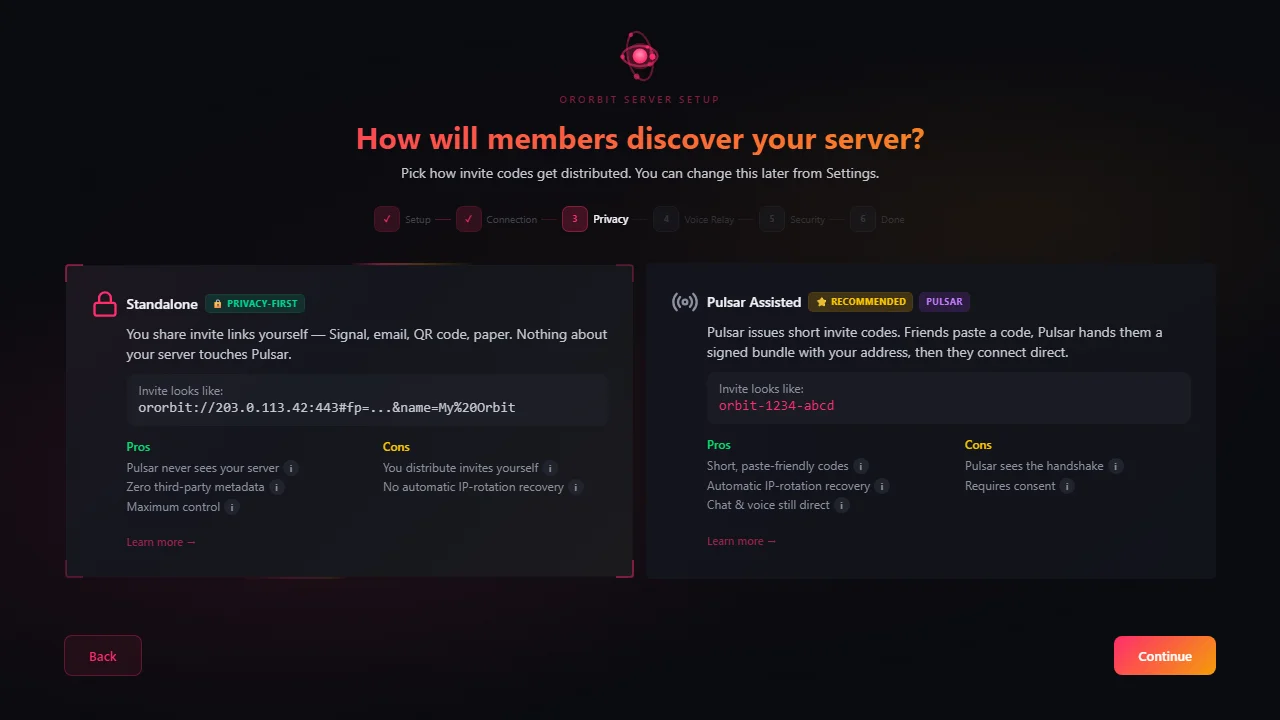
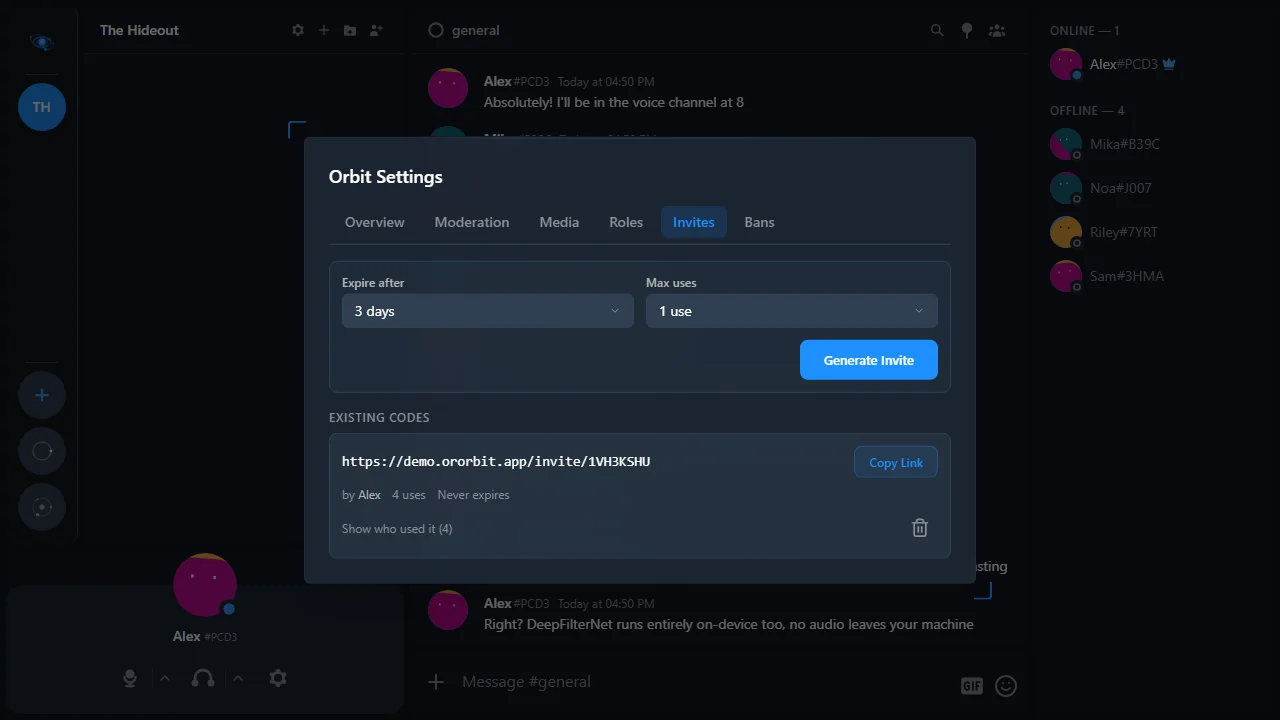
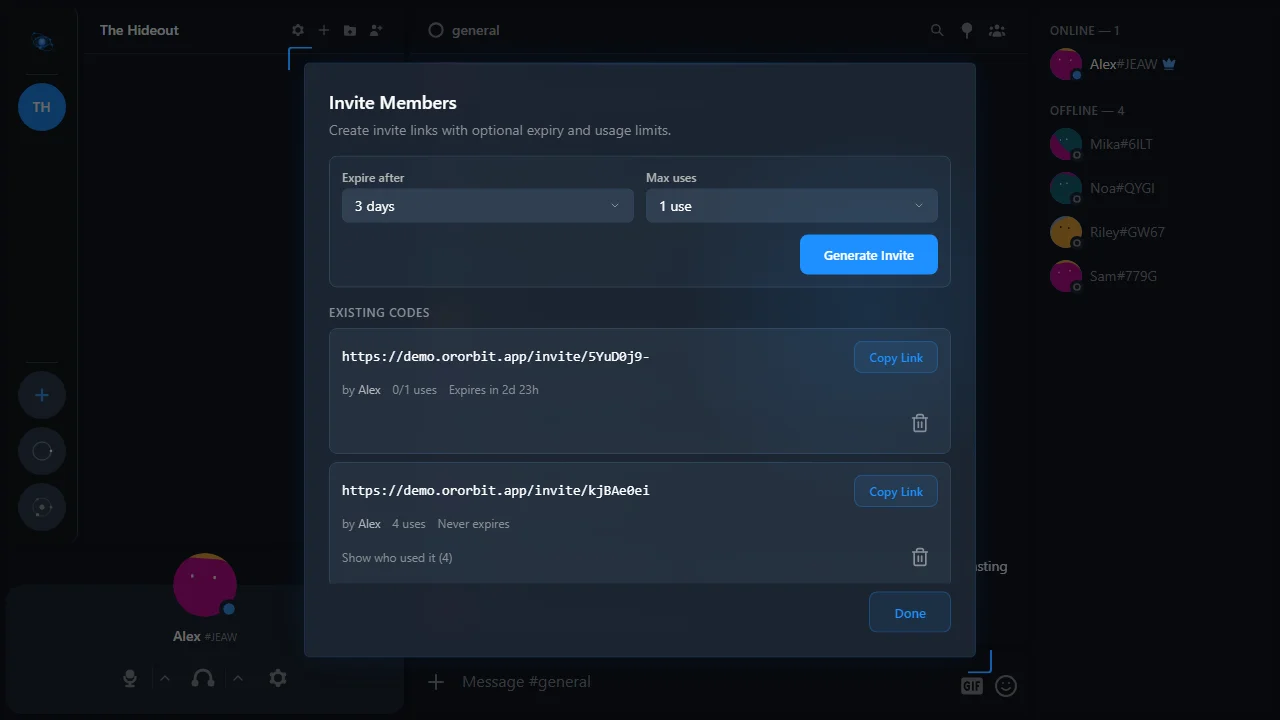
Invite Friends
Create Invite Links
Go to Invites in the admin panel sidebar. Create an invite link and share it with your friends. They’ll use it to join your server.
Connect with the OrOrbit App
Download the OrOrbit client app from the download page — this is separate from the Server App you installed earlier.
You (the server admin):
Open the client app and connect to your own server:
https://localhostYour friends:
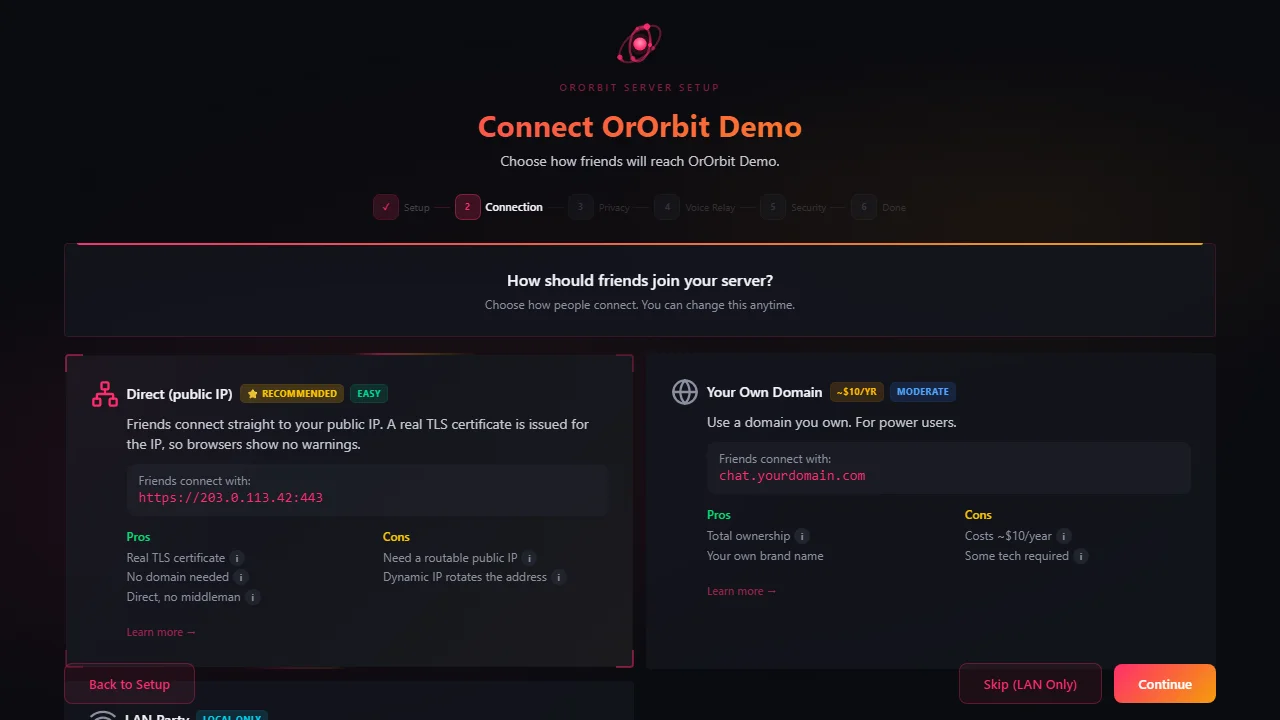
Your friends need your server’s public address. Find it in Admin Panel → Network under “Share with friends” — it will look something like:
https://203.0.113.45Send them that URL along with the invite link from step 5. They enter it in their OrOrbit app and they’re in.
Next Steps
Your server is running — nice! OrOrbit automatically tries to make itself reachable from outside your home network via UPnP. Go to Admin Panel → Network to see your connectivity status and the best URL to share with friends.
If friends can’t connect yet, or you want a permanent address like chat.yourname.com, follow the
Custom Domain guide.
What's next?
Join a Server